Parameters for Laminating Non Woven Fabric with a Single Side Extrusion Coating Machine
You've got a roll of spunbond nonwoven — 20 gsm, soft, breathable, perfect for a medical gown or a diaper backsheet. The customer wants it laminated with a PE film for liquid barrier. You set up the extrusion coating lamination machine the same way you would for paper. The nonwoven shrinks. The edges curl. The resin strikes through to the other side. The roll goes to scrap.
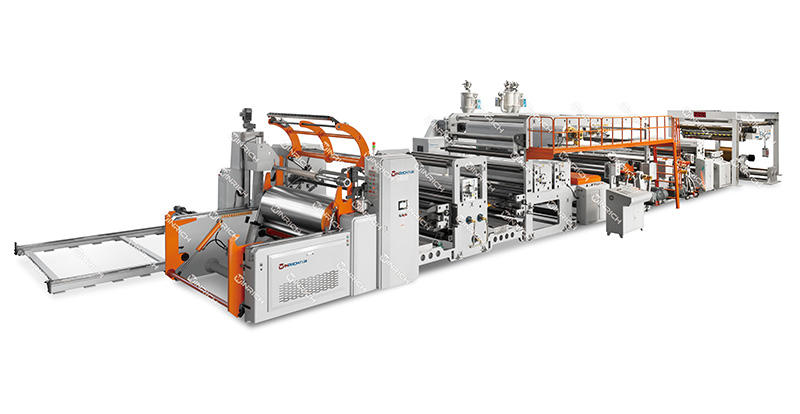
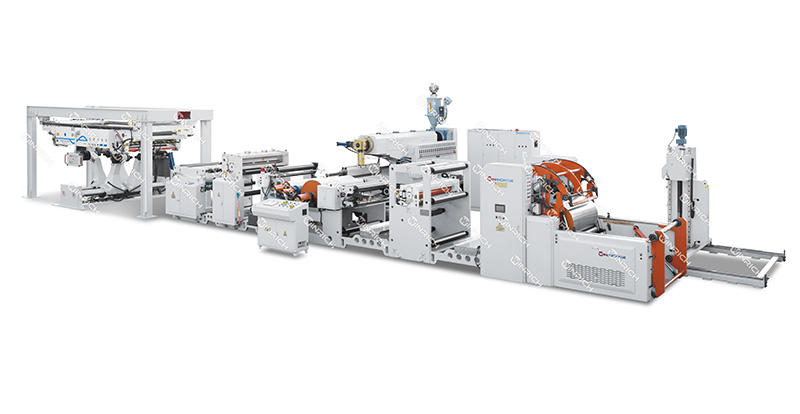
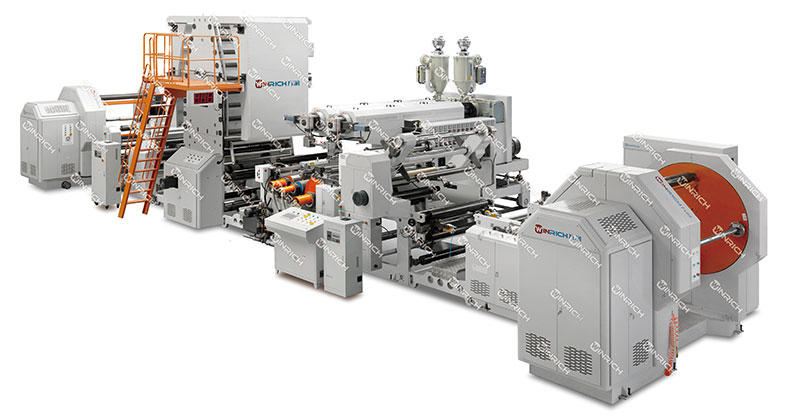
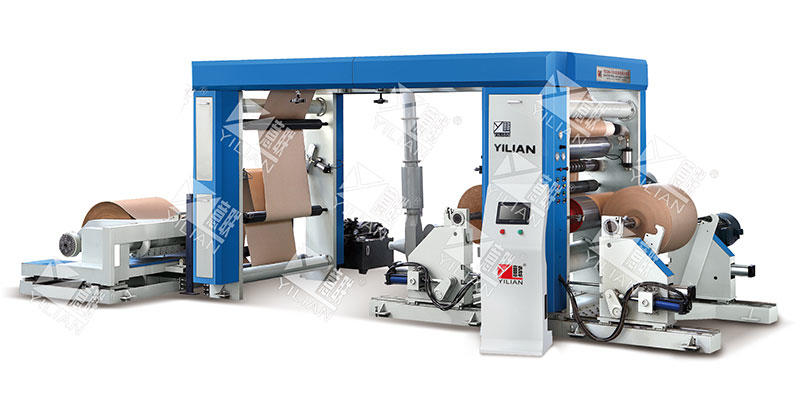
Non-woven fabric is not paper. Its open structure, low melting point, and heat sensitivity demand a different approach. An extrusion coating lamination machine running nonwoven needs lower melt temperatures, softer nip rolls, and slower starting speeds than any other substrate. The Yilian SJFM 1100-2000B series integrates PLC control and automatic hydraulic filter replacement for consistent, high-quality lamination. This guide provides starting parameters for LDPE and PP resins on nonwoven, plus troubleshooting advice for common defects.
Why nonwoven isn't like paper
Nonwoven fabrics — particularly polypropylene spunbond — have properties that make them more challenging to laminate than paper or film.
PP melts at 160°C — your resin is hotter
Polypropylene spunbond typically melts at 160–170°C. This is significantly lower than the melt temperature of LDPE (around 280–300°C). If the molten resin is too hot when it contacts the nonwoven, the fabric can melt, shrink, or develop pinholes. The temperature differential between the resin and the substrate is the single most critical factor in nonwoven lamination.
Holes let resin leak through
Nonwoven fabrics are porous. The fibers are laid down in a random web with open spaces between them. When molten resin is pressed into the fabric, it can flow through the open structure and appear on the opposite side. This "strike-through" creates a stiff, uncomfortable surface that defeats the purpose of a soft nonwoven. It also wastes resin.
Heat makes it shrink — control it
Nonwoven fabrics shrink when exposed to heat. The fibers relax and contract, causing the fabric to pull away from the edges or develop wrinkles. The shrinkage is worse in the machine direction than the cross direction. Controlling the temperature of both the resin and the cooling drum is essential to maintaining dimensional stability.
Resin temperature — not too hot, not too cold
The resin's melt temperature must be high enough to flow and wet out the nonwoven fibers, but low enough to avoid burning or shrinking the substrate.
LDPE runs cooler on nonwoven
For LDPE coating on nonwoven, target a melt temperature of 270–290°C. This is 10–20°C lower than what you'd use for paper or board. The lower temperature reduces the risk of thermal damage to the polypropylene fibers while still allowing the LDPE to flow and bond. Running above 290°C on lightweight nonwoven (<30 gsm) almost guarantees shrinkage and strike-through.
PP resin needs bonding grade — or it won't stick
If you're using polypropylene resin for the coating layer — which creates a fully recyclable all-polypropylene laminate — the melt temperature should be 240–260°C. This is closer to the nonwoven's melting point, so precise temperature control is essential. Use a bonding-grade PP resin formulated for extrusion coating; general-purpose PP will not wet out properly.
5°C too hot and it burns — 5°C too cold and it peels
If the melt temperature is too low, the resin won't flow into the fiber structure, and adhesion will be poor. If it's too high, the nonwoven will shrink, melt, or develop holes. The window for nonwoven is narrower than for paper — typically ±5°C instead of ±10°C. Monitor melt temperature closely and adjust in 2–3°C increments.
Pressure and roll — how much is too much?
The nip pressure determines how firmly the molten resin is pressed into the nonwoven. Too much pressure crushes the fibers; too little gives poor adhesion.
Less pressure, less crushing
For nonwoven lamination, set the nip line pressure to 20–30 N/mm. That's about 30% lower than the 30–50 N/mm typical for paper. The lower pressure reduces the risk of crushing the nonwoven's open structure or forcing resin through to the back side.
Soft roll conforms, hard roll crushes
Use a pressure roll with hardness of 70 Shore A — softer than the 85–90 Shore A used for foil or paper. A softer roll conforms to the nonwoven's uneven surface, distributing pressure evenly without crushing the fibers. Harder rolls create localized high-pressure points that can damage the fabric.
Nip width tells you if pressure is right
The nip width — the visible flattening of the pressure roll against the cooling drum — should be 8–12mm for nonwoven. If it's narrower, increase pressure. If it's wider, you may be over-pressuring the web, which can cause strike-through or fiber damage.
Speed kills on nonwoven — start slow
Nonwoven is less forgiving than paper at high speeds. A cautious start-up protocol prevents waste.
Start slow — 50 to 80
Start the line at 50–80 m/min for the first 10–15 minutes. This slower speed gives you time to check the coating appearance, edge condition, and adhesion before committing to full production speed. Run a few meters, stop, and inspect.
Speed up only after it looks right
Once the coating is stable at low speed, gradually increase to 120–150 m/min in 10–20 m/min increments. At each step, stop and inspect for shrinkage, strike-through, or edge curl. If you see any defects, back off the speed and adjust temperature or pressure.
Faster isn't always better
At higher speeds, the nonwoven spends less time in contact with the heated nip and cooling drum, reducing thermal exposure. This can actually improve quality by minimizing heat damage. However, higher speeds also mean less time for the resin to wet out, which can reduce adhesion. The optimal speed is a balance — fast enough to avoid overheating, slow enough to achieve good bonding.
Does it need treatment? Check the dyne
Nonwoven fabrics are often pre-treated to improve adhesion. Knowing whether your material needs treatment — and what kind — is essential.
Test the dyne before you run
Most spunbond nonwoven is corona-treated at the mill. The surface energy should be at least 38 dynes/cm for good adhesion with LDPE. Use a dyne pen to test the incoming roll. If the dyne level is below 36, the resin won't wet out properly, and adhesion will fail.
Corona works on most nonwovens
If the dyne level is low, install an in-line corona treater before the nip. Corona treatment oxidizes the fiber surface, increasing surface energy and improving adhesion. For most spunbond nonwoven, corona treatment at 2–3 kW is sufficient.
Flame for heavy fabrics — but watch the burn
For heavier nonwoven (>50 gsm) or for fabrics with low surface energy, flame treatment can be more effective than corona. The flame oxidizes a deeper layer of the fiber surface, creating a stronger bond. However, flame treatment requires careful control to avoid burning the fabric.
Test a small piece before you run a full roll
Every batch of nonwoven can behave differently. A short trial protocol saves a full roll of scrap.
Start with a low melt temperature. Begin at the lower end of the recommended range — 270°C for LDPE. Run a short length at 50 m/min.
Inspect for strike-through. Check the back side of the nonwoven for any resin penetration. If you see resin on the back, reduce the nip pressure or increase the line speed.
Check the edges for shrinkage. If the edges are pulling in, the melt temperature is too high or the cooling drum is too warm. Reduce temperature by 5°C and try again.
Test adhesion. Use the tape test — apply 3M 810 tape to the coated surface and pull it off quickly. If the coating comes off with the tape, increase melt temperature by 5°C or reduce line speed.
Document the settings. Record the melt temperature, nip pressure, line speed, and cooling drum temperature that produced acceptable quality. This becomes your starting point for the next batch from the same supplier.
Edge curl? Spotty bond? Here's the fix
Two issues appear more often than others when running nonwoven.
Edges pulling in — drop the heat
If the edges of the nonwoven are pulling inward or curling, the melt temperature is too high or the cooling is insufficient. Reduce the melt temperature by 5–10°C. Also check that the edge guides are not pinching the fabric. Some operators reduce the edge temperature of the die by 5–10°C using zone heaters, which can help without affecting the center of the web.
Patchy bond — check pressure across the width
If adhesion is patchy — good in some areas, poor in others — the most likely cause is uneven nip pressure across the width. Check the pressure roll for wear or damage. Use a nip impression test (carbon paper between the rolls) to verify uniform pressure across the full width. Also check the nonwoven's basis weight uniformity; variations in fiber density affect adhesion.
Below is a quick reference table for key nonwoven lamination starting parameters:
| Parameter | Nonwoven (PP Spunbond) | Paper (for comparison) |
|---|---|---|
| LDPE melt temp | 270–290°C | 300–320°C |
| PP melt temp | 240–260°C | N/A |
| Nip pressure | 20–30 N/mm | 30–50 N/mm |
| Roll hardness | 70 Shore A | 80–85 Shore A |
| Nip width | 8–12mm | 8–12mm |
| Starting line speed | 50–80 m/min | 80–120 m/min |
| Production speed | 120–150 m/min | 150–250 m/min |
| Cooling drum temp | 15–25°C | 25–35°C |
Three questions from the floor
Q: Two layers — more pressure, more heat
A: Yes, but with adjustments. Laminating two nonwoven layers creates a thicker, more absorbent structure. The nip pressure should be increased to 25–35 N/mm to ensure the resin penetrates both layers. The melt temperature may need to be increased by 5–10°C to maintain flow through the thicker web. Run a trial with scrap material before committing to production.
Q: Wrap around the drum? Check the doctor blade
A: Roll wrap occurs when the coated web sticks to the cooling drum instead of following the web path. This is more common with nonwoven because of its low stiffness. To prevent wrap: ensure the cooling drum is clean and free of residue; confirm the doctor blade is functioning and the scraper is set correctly; increase the air knife pressure to hold the web against the drum; and verify the cooling drum temperature is not too high (above 25°C increases tack).
Q: Silicone on the roll — needed or not?
A: It depends. Silicone release on the pressure roll prevents the resin from sticking to the roll surface, which is more of an issue with high-adhesion resins like EAA. For standard LDPE on nonwoven, silicone release is not typically required. However, if you're seeing resin buildup on the roll, a silicone coating or release agent can help. Use a food-grade silicone approved for indirect food contact if your product is for hygiene or medical applications.
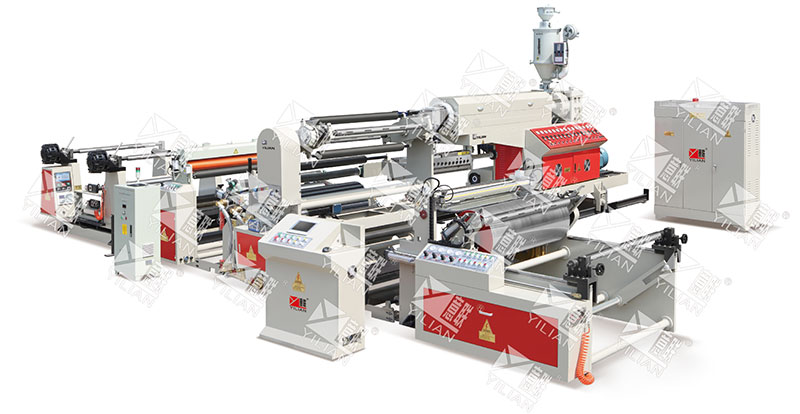
The machine that handles nonwoven without the headache
Yilian Machinery's SJFM 1100-2000B series is designed for high-speed extrusion lamination of flexible substrates, including nonwoven fabrics. The machine integrates PLC man-machine interface control, mechatronic design, and automation for streamlined production. Features include a shaftless unwinder with auto splicing system, a hydraulic compounding system for even coating, and an automatic hydraulic filter replacement system for reliable operation.
For hygiene and medical product manufacturers, the combination of precise temperature control, adjustable nip pressure, and PLC-driven line speed makes the SJFM series a practical choice for nonwoven lamination. Before you commit to a full production run on a new nonwoven batch, run a short trial with the parameters in this guide. Test adhesion and inspect for strike-through. Record the batch number and the settings that worked. A few hours of validation saves a whole roll of scrap.
Need help setting up your extrusion coating lamination machine for nonwoven fabric? Contact Yilian Machinery for a trial run or product consultation. Share your nonwoven type, basis weight, and target resin — their technical team can provide customized starting parameters for your specific application.